


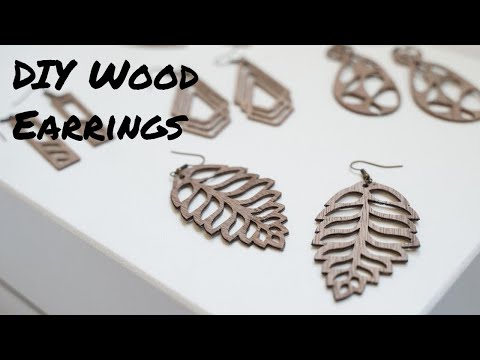
This is a tutorial with free SVGs on how to make wood earrings with both the Cricut Explorer and Maker.
A while back, I did a project with basswood earrings and the Cricut Maker. I really didn’t enjoy that project. The sawdust got everywhere, it took forever to do a single cut, everything was just a mess.
I then discovered Cricut wood veneers. What a joy it is to work with compared to the thicker wood projects!
Now I can make all sorts of wood jewelry with intricate designs with just a deep blade meaning it opens up all sorts of projects for the Cricut Explorer.
Wood veneers are not only easier to work with, you can also make much more elaborate designs. The wood veneers I used had a polymer-based film that held the fibers intact. There is no way I would be able to make these more intricate cuts with balsa wood or other thicker craft wood sheets.

*this article contains affiliate links for your convenience, see full disclosures here
Materials for DIY Wooden Jewelry
Cricut Wood Veneer – The Cricut Walnut Veneer makes beautiful earrings and other jewelry without additional need for staining or treatment. It is the most brittle. If you are looking for something flexible, I would try the Cricut Cherry Veneer or Cricut Maple Veneer.
Deep Point Blade – You can use the same housing as the fine point blade but I would invest in a longer blade for this project.
Strong Grip Mat – The purple mat is best for this project especially if you are cutting more intricate designs.
Painter’s Tape – You will need to tape down the wood veneer onto the mat.
Cardstock – Kraft or black cardstock works. For some of the designs, you need a reinforcing layer. Many things can be used for this from cardstock to mylar sheets. I chose cardstock because it looks the best sandwiched between the veneer sheets.
Glue – I found polymer glue to work best for this project. Tacky glue is what I used. You could use a wood glue, E6000 or a hot glue gun but this stuff is going to get all over your fingers so since polymer glue is non-toxic and not hot, I found it to be a better fit for these earrings.
Cutting Machine – I use a Cricut. Check out my recommendations for Cricut machines and accessories for beginners for more info.
Wood Earring Templates – My entire set of Cricut wood earrings SVGs are available for free in my resource library.
How to make wooden earrings with the Cricut


Step 1: How to cut wood for jewelry with the Cricut Explorer or Maker
First, tape down the Cricut wood veneer sheet along the edge with the painter’s tape. This will help further secure the wood as it is cutting.
I would try to only cut one pair of earrings at a time. The reason for this is it creates a lot of sawdust and you want the opportunity to do a little clean up between cuts. While wood veneers do create some sawdust, it is nothing compared to thicker craft wood.
After each cut and before removing any cut pieces, use a lint roller or the painters take and do a little swipe of the sawdust so it doesn’t get everywhere. More importantly, you don’t want it getting on the mat.

Step 2: Removing the designs from the mat
I used a part of needle nose tweezers to dig each earring out. I ran one edge of the tweezers underneath the earring. I found this method to minimize chipping which is inevitable.
Step 3: Prepare and cut the reinforcing layer
Cut the cardstock or mylar sheets at this point. For some of the designs, I found I didn’t really need a reinforcing layer. I just glued two veneer sheets together. This is really up to you.
Step 4: How to finish wood veneer layers
I found using a brush to apply a generous coat of the Tacky Glue to be the most effective. Then after sandwiching everything together, I used a toothpick or paper scrap corner to wipe up the edges.

Tacky Glue dries clear so you only need to clean up the big globs of glue. It’s ok if a little gets on the surface or edge.
Step 4: Optional sealant
My preferred sealant is matte Mod Podge because it is non-toxic. You could also use Acrylic Spray.


I also have a separate article on how to make cute wood earring displays for your new project:


Of course, you can use this same methodology to make other DIY wooden jewelry. I find handmade wooden earrings and other accessories have a really refreshing yet wholesome look to them. They are super flexible as accessories as well. They can be dressed up for a night out on the town or for casual every day outfit.
If you’re interested in cutting actual wood sheets (slightly thicker than wood veneer), check out my tutorial on how to cut wood with the Cricut Maker here.


Interested in related project SVG designs? Check out my Premium SVG Membership:
Related Articles:
How to cut wood with the Cricut Maker
DIY Feather Faux Leather Earrings


